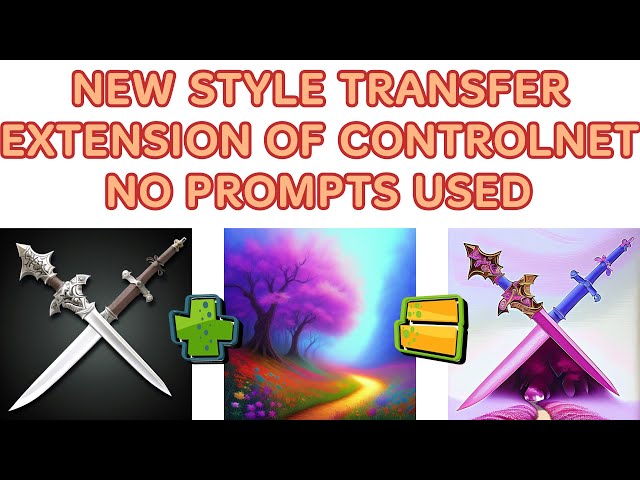
New Style Transfer Extension ControlNet of Automatic1111 Stable Diffusion T2I Adapter Color Control
New Style Transfer Extension, ControlNet of Automatic1111 Stable Diffusion T2I-Adapter Color Control
Full tutorial link > https://www.youtube.com/watch?v=tXaQAkOgezQ


Discord : https://bit.ly/SECoursesDiscord. New fantastic style transfer feature via T2I-Adapter added to the #ControlNet extension. If I have been of assistance to you and you would like to show your support for my work, please consider becoming a patron on 🥰 https://www.patreon.com/SECourses
Playlist of #StableDiffusion Tutorials, #Automatic1111 and Google Colab Guides, DreamBooth, Textual Inversion / Embedding, LoRA, AI Upscaling, Pix2Pix, Img2Img:
https://www.youtube.com/playlist?list=PL_pbwdIyffsmclLl0O144nQRnezKlNdx3
TencentARC / T2I-Adapter GitHub Repo:
https://github.com/TencentARC/T2I-Adapter
Extension Github Repo: https://github.com/Mikubill/sd-webui-controlnet
Academic Paper - T2I-Adapter: Learning Adapters to Dig out More Controllable Ability for Text-to-Image Diffusion Models:
https://arxiv.org/abs/2302.08453
How to install Python and set default path tutorial:
Automatic1111 GitHub Repo:
https://github.com/AUTOMATIC1111/stable-diffusion-webui
git link:
https://github.com/git-for-windows/git/releases/download/v2.39.2.windows.1/Git-2.39.2-64-bit.exe
Git Bash: https://git-scm.com/downloads
Git Large: https://git-lfs.com/
Automatic1111 Web UI Command Line Arguments and Settings:
https://github.com/AUTOMATIC1111/stable-diffusion-webui/wiki/Command-Line-Arguments-and-Settings
1.5 pruned ckpt model file :
https://huggingface.co/runwayml/stable-diffusion-v1-5/tree/main
How to use Stable Diffusion V2.1 and Different Models in the Web UI - SD 1.5 vs 2.1 vs Anything V3 - how to set yaml files:
ControlNet model files repository:
https://huggingface.co/lllyasviel/ControlNet
Style transfer T2I-Adapter models repository:
https://huggingface.co/TencentARC/T2I-Adapter
Transform Your Sketches into Masterpieces with Stable Diffusion ControlNet AI - How To Use Tutorial:
Sketches into Epic Art with 1 Click: A Guide to Stable Diffusion ControlNet in Automatic1111 Web UI:
Fantastic New ControlNet OpenPose Editor Extension & Image Mixing - Stable Diffusion Web UI Tutorial:
00:00:00 Introduction to newest extension Style Transfer in ControlNet
00:00:31 Requirements for installing and running Automatic1111 Web UI
00:01:42 How to make a fresh installation of Automatic1111 Web UI
00:04:11 Versions of installed libraries, python, torch, xformers
00:04:21 What does commit and checkpoint means
00:04:40 How to update Automatic1111 Web UI manually via git pull
00:04:53 How to use certain commit, certain version via git checkout
00:05:27 How to upgrade / install the latest best working xformers version
00:06:51 How to install ControlNet extension
00:08:06 How to enable / activate multi controlnet feature
00:08:30 Where to find controlnet extension
00:08:38 How to download controlnet necessary model files
00:10:13 How to download adapter transfer models
00:11:45 How to use style transfer feature of ControlNet
00:12:37 How to use multi controlnet to keep image shape better canny + hed
00:13:34 Which settings to achieve style transfer in controlnet tab
00:14:38 The improvement of using 2 preprocessor
00:16:49 How to improve art style / coloring of existing artwork via ControlNet
00:18:00 A very nice trick that you can use in your professional business life
Abstract from paper
The incredible generative ability of large-scale text-toimage (T2I) models has demonstrated strong power of learning complex structures and meaningful semantics. However, relying solely on text prompts cannot fully take advantage of the knowledge learned by the model, especially when flexible and accurate structure control is needed. In this paper, we aim to “dig out” the capabilities that T2I models have implicitly learned, and then explicitly use them to control the generation more granularly. Specifically, we propose to learn simple and small T2I-Adapters to align internal knowledge in T2I models with external control signals, while freezing the original large T2I models. In this way, we can train various adapters according to different conditions, and achieve rich control and editing effects. Further, the proposed T2I-Adapters have attractive properties of practical value, such as composability and generalization ability. Extensive experiments demonstrate that our T2I-Adapter has promising generation quality and a wide range of applications.
• Plug-and-play. They do not affect the original network topology and generation ability of existing text-to-image diffusion models (e.g., Stable Diffusion).
• Simple and small. They can be easily inserted into existing text-to-image diffusion models with low training costs. They have a small number of parameters (∼ 77 M) and small storage space (∼ 300 M), which will not introduce much computation cost.
• Flexible. We can train various adapters for different control conditions (e.g., sketch, semantic segmentation, keypose).
thumbnail freepik brgfx
-
00:00:00 Greetings everyone.
-
00:00:01 Today I will show you how to install and run newest feature style adapter.
-
00:00:06 This new feature has been added to the Mikubill's sd-webui-controlnet extension, which is the
-
00:00:12 extension we are using for ControlNet in our Automatic1111 web UI.
-
00:00:15 I have been getting asked so many times that extension is not working or web UI not working.
-
00:00:20 Therefore, I will show you both how to do fresh installation and how to update extension
-
00:00:26 or web UI if it is not updating automatically.
-
00:00:29 There are two things that needs to be installed.
-
00:00:32 First installing python and setting environment path.
-
00:00:35 Let me show you.
-
00:00:36 Open your command line interface by typing cmd command prompt.
-
00:00:41 After you opened this interface, just type python and you should get default python like
-
00:00:47 this.
-
00:00:48 You see I am using 3.10.8.
-
00:00:51 The suggested version is 3.10.6.
-
00:00:53 You see this is the suggested version on the Automatic1111 web UI wiki.
-
00:00:58 However, I find that 3.10.8 is also working very well.
-
00:01:02 If you are unable to install python and set its path correctly, I have an excellent tutorial
-
00:01:07 video for that on my channel.
-
00:01:09 This is that tutorial.
-
00:01:11 I will put the link into the description.
-
00:01:13 The second thing is installing Git.
-
00:01:15 You can either use Git linked in here.
-
00:01:18 You see Git or you can install Git Bash, which is something that I am using.
-
00:01:23 I find that very useful.
-
00:01:24 Also, if you try to download very big files with git clone, you need git large.
-
00:01:30 It is here.
-
00:01:31 When I installed Git Bash, I think it also installed Git Large.
-
00:01:34 So I didn't install this separately.
-
00:01:36 But if it doesn't work, make sure that you have installed git large.
-
00:01:39 First, I will begin with doing a fresh installation of the web UI.
-
00:01:44 I have composed my new folder as style transfer inside my c drive.
-
00:01:48 Click the path here and type cmd.
-
00:01:51 It will open a cmd window and you see the location is style transfer.
-
00:01:55 The location is very important when you are executing commands on the cmd window.
-
00:02:01 So then the second thing is copy the URL of the web UI type git clone.
-
00:02:06 Paste the URL with right click of your mouse or you can right click here, edit and click
-
00:02:10 paste.
-
00:02:11 Then hit enter and it will start cloning into that folder.
-
00:02:14 OK, the clone is completed.
-
00:02:17 You see it is cloned here.
-
00:02:18 Open it.
-
00:02:19 The things that I am setting in my command line arguments is only xformers.
-
00:02:23 To do that, open webui-user.bat file, right click the file, click edit.
-
00:02:30 And this is the command line arguments window.
-
00:02:32 On this page, you can find all of the command line arguments of Automatic1111 web UI.
-
00:02:38 So I will type dash dash xformers.
-
00:02:41 This is really important to use if your graphic card do not have at least 24 gigabyte VRAM.
-
00:02:45 It is also useful for big VRAM having cards as well.
-
00:02:49 When generating images, it speeds up your generation significantly.
-
00:02:53 Then we need to put the model file inside the model folder.
-
00:02:58 You can download the model file from here.
-
00:03:01 Just click the download and it will download the model file.
-
00:03:04 This is the same procedure for every custom models or other things.
-
00:03:08 Just download them and put that inside that folder.
-
00:03:10 If the model is based on 2.1 version, then you need to set this YAML file.
-
00:03:16 In this tutorial, I have explained how to use 2.1 version YAML files or use custom models
-
00:03:22 on Automatic1111 web UI.
-
00:03:24 After I have put my base model inside the model folder, then I am ready to launch my
-
00:03:30 Automatic1111 web UI.
-
00:03:32 Just double click the web UI user.bat file.
-
00:03:35 It will install all of the necessary requirements for you.
-
00:03:39 Okay, installation has been completed.
-
00:03:41 Let me show you some of the important things.
-
00:03:44 You see that it is launching web UI with arguments dash dash xformers because this is the only
-
00:03:49 argument we have provided.
-
00:03:51 It installed all other necessary dependencies.
-
00:03:54 Also creating model from configs version one dash inference YAML.
-
00:03:59 So this is the default YAML file it is going to use.
-
00:04:03 So it loaded our version 1.5 pruned ckpt file.
-
00:04:07 And then we can access our web UI from this URL.
-
00:04:10 And our web UI is loaded.
-
00:04:12 In the very bottom, you will see the installed versions of the libraries.
-
00:04:17 Python, torch, xformers, gradio, commit and checkpoint.
-
00:04:21 The commit and checkpoint means that which commit of the Automatic1111 web UI is used.
-
00:04:28 So this is the latest commit apparently.
-
00:04:30 You can see the all commits from clicking here and you can see the all of the commits
-
00:04:34 here.
-
00:04:35 Let's say you already have an installation of Automatic1111 web UI and you want to update
-
00:04:40 it.
-
00:04:41 So start your cmd window in that folder type git pull.
-
00:04:46 It will pull the all of the newest changes.
-
00:04:50 Let's say you want to use certain commit, certain version.
-
00:04:53 First, go to the commits and pick the version that you want to use.
-
00:04:57 Let's say I want to use this commit.
-
00:04:59 I am copying the hash here or you can also copy the commit from here.
-
00:05:05 Then type git checkout, type the commit version.
-
00:05:09 And now you see switching to this commit head and all of the files are now same as in this
-
00:05:17 version.
-
00:05:18 Now I will return back the latest commit, which is this one git checkout and the latest
-
00:05:23 commit.
-
00:05:24 Okay, currently xformers version 16 is installed and this is not a good version to use.
-
00:05:30 So first I will show you how to install the latest 17 version.
-
00:05:34 To do that, close your command line, close your web UI instance, then enter inside venv
-
00:05:41 folder, enter inside scripts folder inside scripts folder.
-
00:05:45 Open your command line interface.
-
00:05:47 You see currently this is where I am.
-
00:05:50 Type activate.
-
00:05:51 Now you see there is venv inside parentheses here.
-
00:05:55 This means that we have activated this venv folder.
-
00:05:59 Then type pip uninstall xformers.
-
00:06:02 It will ask you if you want to uninstall or not.
-
00:06:04 Yes.
-
00:06:05 Then type pip install xformers equal equal 0.0.17.dev 466.
-
00:06:12 This is the latest development version and it will install the latest version.
-
00:06:18 This version supports training with DreamBooth or Textual Inversion.
-
00:06:21 Also, it is faster and better for newer graphic cards as well.
-
00:06:25 Okay, it is installed.
-
00:06:26 Now I will restart my web UI.
-
00:06:29 When you are starting your web UI instance, it also shows the commit hash on here and
-
00:06:34 you can see that this hash is equal to the hash displayed in the URL of the GitHub.
-
00:06:40 Okay, it has been started.
-
00:06:41 Let's open the instance.
-
00:06:43 Okay, now in the bottom I see that xformers 0.0.17.dev 466.
-
00:06:50 So it has been installed properly.
-
00:06:51 Now go to the extensions tab, click available, load from.
-
00:06:56 In here, search for controlnet.
-
00:06:59 You are searching for sd-web-ui-controlnet.
-
00:07:01 When you click here, it will open this repository.
-
00:07:06 It is important.
-
00:07:08 Mikubill sd-web-ui-controlnet.
-
00:07:09 Because there are several controlnet extensions that you may see in here.
-
00:07:14 This is the correct one.
-
00:07:15 If you have any other extension, named as sd-web-ui-controlnet in your extensions folder.
-
00:07:21 In here, you need to delete them.
-
00:07:23 Otherwise, it will conflict.
-
00:07:24 Click install.
-
00:07:25 Okay, now we see that it is displaying installing sd-web-ui-controlnet requirements here.
-
00:07:31 However, it shows that it is installed already into the folder.
-
00:07:35 So what am I going to do is I will restart the web UI instance.
-
00:07:39 Let's say you already have these extensions installed and you want to update it.
-
00:07:43 Enter inside the folder of the extension.
-
00:07:46 Start your command line interface.
-
00:07:48 You see currently I am inside that extension type git pull.
-
00:07:52 It will pull the latest version and update the extension.
-
00:07:55 Then when you restart your web UI, it will install the necessary dependencies of the
-
00:08:01 extension.
-
00:08:02 Okay, restart completed.
-
00:08:03 Let's open it.
-
00:08:04 Okay, web UI is restarted.
-
00:08:06 The first thing that I am going to do is I will enable multi-controlnet.
-
00:08:11 Go to the settings and in here you will see controlnet options here and in here.
-
00:08:17 Allow multi-controlnet.
-
00:08:19 Let's say I want to allow up to five multi-controlnet.
-
00:08:22 This is up to you that how many you want to use.
-
00:08:25 Apply settings then reload UI.
-
00:08:27 Okay, UI has been reloaded.
-
00:08:29 Now in the text to image tab or in the image to image tab, we will see controlnet extension.
-
00:08:34 However, we didn't download the necessary models for this extension to work yet.
-
00:08:40 So what are we going to do is on the extension repository, it links to the necessary models
-
00:08:46 Hugging Face repository.
-
00:08:47 It is in here pre-trained models.
-
00:08:50 Open it.
-
00:08:51 Then we are going to download the model files that we want to use.
-
00:08:55 You can git clone all of this inside your folder if you have installed the git large.
-
00:09:01 So to do that, enter inside your extensions, enter inside the folder in here.
-
00:09:07 So this is the folder where you need to download model files.
-
00:09:11 You can use git clone.
-
00:09:13 So it will download eight files, which is like 44 gigabytes.
-
00:09:18 So let's say you want to download them with git clone.
-
00:09:22 The URL you need to use is the main repository link of the controlnet on Hugging Face.
-
00:09:27 Make a new folder anywhere you want to download.
-
00:09:30 Let's say I will download them inside here.
-
00:09:32 Type anything you want, like models.
-
00:09:34 Enter inside there.
-
00:09:35 Open a command line window, type git clone and controlnet repository, and it will download
-
00:09:41 whatever exists on files and versions.
-
00:09:45 However, we need only models folder, so we will get what is inside models folder into
-
00:09:49 the proper directory.
-
00:09:50 This will take a lot of time and it is not displaying the process.
-
00:09:55 So you can follow the process from your task manager ethernet.
-
00:09:59 I already have the downloaded models, so I will copy and paste them.
-
00:10:02 OK, all model files are copied and downloaded inside the extension folder.
-
00:10:08 However, these were necessary for the base controlnet.
-
00:10:11 Now we need to download adapter transfer models.
-
00:10:16 T2i adapter support.
-
00:10:18 These are different files.
-
00:10:20 You see, there are also YAML files for these files and these YAML files are automatically
-
00:10:25 downloaded from the GitHub repository of the extension.
-
00:10:29 So you don't need to download them manually.
-
00:10:31 What we need to download manually is downloading the files on this Hugging Face repository.
-
00:10:36 T2i adapter.
-
00:10:37 I will use git clone for this.
-
00:10:40 So I am opening a folder inside here, clone, new models, opening CMD, git clone and type
-
00:10:48 it and it will download all of the model files.
-
00:10:50 You see, it is not displaying any process again, unfortunately, but I am watching the
-
00:10:55 ethernet there.
-
00:10:56 I will know whether they are all downloaded or not.
-
00:10:59 Alternatively to the git clone, you can go to the files and versions, enter inside models
-
00:11:05 and click the files that you want to download like this.
-
00:11:09 Then click download and it will download each model file manually through your browser.
-
00:11:14 Then you can cut and paste them into the necessary folders.
-
00:11:18 All files have been downloaded.
-
00:11:19 You see, there is no ethernet activity anymore.
-
00:11:22 So what we need to do is enter inside the cloned folder, go to the models, cut them
-
00:11:27 and put them inside the model folder.
-
00:11:30 This is the folder where you need to put them.
-
00:11:32 I am also going to put the third party models as well.
-
00:11:35 Okay, this is now how my models for SD web UI control that extension looks.
-
00:11:41 Okay, now we can start using style transfer of control net.
-
00:11:45 Go to the text to image tab and in here go to the control that section in the bottom
-
00:11:50 you will see.
-
00:11:51 We are going to use to preprocessor and model to get the shape of our image.
-
00:11:57 I have generated several images to demonstrate you.
-
00:12:01 Our base image will be this sword.
-
00:12:03 I will upload it like here, then select as a preprocessor canny and canny as a model
-
00:12:10 here.
-
00:12:11 Click enable.
-
00:12:12 If your image size is bigger than 512, you can change annotator resolution.
-
00:12:17 This affects how you're going to get your map for this image.
-
00:12:21 Let me show you when I click preview annotator result.
-
00:12:24 This is the current result.
-
00:12:25 If I make it 1024 and click preview, this is the another result.
-
00:12:30 So by using bigger annotator resolution, you may get a better map image like this.
-
00:12:37 So we are going to use multi control net to keep the image quality better.
-
00:12:42 So in the second tab, I am also going to upload the same image again.
-
00:12:46 Click enable.
-
00:12:47 Don't forget to click enable.
-
00:12:48 Also, if you get out of memory error, don't forget to check low VRAM and then select the
-
00:12:54 hed as a preprocessor and select hed once again.
-
00:12:57 And then you can see the hed resolution here as well.
-
00:13:00 When you click the preview, you will see.
-
00:13:02 So let's also try to increase this.
-
00:13:05 And this is another one.
-
00:13:06 So annotator resolution will affect how you are going to get your map image.
-
00:13:11 And in the third tab, we are going to upload our style image.
-
00:13:15 So for styling, I have generated this image.
-
00:13:18 Let me show you this one.
-
00:13:20 It's a simple image.
-
00:13:21 To generate this image I have used very beautiful digital drawing nature artwork, intricate
-
00:13:26 masterpiece, very colorful, epic.
-
00:13:28 And I have used deliberate version 2 safe tensors file.
-
00:13:31 And in here, we are going to pick clip vision as a preprocessor.
-
00:13:35 This is really important.
-
00:13:36 And we are going to pick T2i adapter style.
-
00:13:39 If you are not seeing any model here, don't forget to click this icon.
-
00:13:43 It will refresh model list.
-
00:13:45 So what is important when doing style transfer?
-
00:13:48 The important, the most important thing is the guidance start and guidance end.
-
00:13:52 This will affect your results significantly.
-
00:13:54 Also, don't forget to change output resolution to your target resolution.
-
00:13:59 I am using 512 at the moment.
-
00:14:02 You can also include prompts as positive and negative.
-
00:14:04 It will also change your output.
-
00:14:06 But for demonstration, I am not going to use any prompt and let's see what we are going
-
00:14:10 to get.
-
00:14:11 And this is the output we got.
-
00:14:13 So you see it is completely stylized according to our style image.
-
00:14:18 I can see that we didn't provide any prompts.
-
00:14:21 By the way, the prompts will also make this image better in terms of quality.
-
00:14:25 These are the map images generated by the canny edge and hed processor.
-
00:14:30 So I am using two preprocessors to get a better results.
-
00:14:34 Also, we can disable them and test one by one.
-
00:14:38 Okay, when I disable the hed processor, this is the result we got.
-
00:14:43 So you see using two preprocessors making huge difference, huge improvement over using
-
00:14:49 only one preprocessor.
-
00:14:51 So when we use only canny preprocessor, this is the image we got.
-
00:14:55 But when we use two preprocessors, the hed preprocessor, hed model and canny preprocessor,
-
00:15:01 canny model, we are getting much better shape.
-
00:15:03 We are able to keep the shape of the image much better.
-
00:15:07 And each time we generate an image, we get different results.
-
00:15:11 So what happens if we put some prompts and this is the result.
-
00:15:15 The first result we get when we used this prompt.
-
00:15:18 So this is how you are applying style transfer.
-
00:15:21 Actually, this is the third time I am recording this section of the video because in the first
-
00:15:27 one, I forgotten to enable microphone.
-
00:15:30 In the second one, I have spent a lot of time and it wasn't working because it turns out
-
00:15:34 that there was a bug in the extension.
-
00:15:37 I opened a thread on the GitHub and thankfully the Mikubill fixed the error.
-
00:15:43 So you see in the first one, I was getting totally unrelated results.
-
00:15:47 And now it is working very well.
-
00:15:49 So you can try to change the guidance start and guidance end.
-
00:15:52 This is the most important thing when applying style transfer.
-
00:15:57 So this is the result we get when I make the guidance start as 40 percent and guidance
-
00:16:03 end at the 100 percent.
-
00:16:05 If you wonder what are these, the weight and guidance strength start end is explained on
-
00:16:10 the GitHub page of the extension.
-
00:16:12 So you can pause the video and read it this section.
-
00:16:15 So this is how you can apply styles to existing images.
-
00:16:20 If you upload a scribble image here or an image like this, then you shouldn't select
-
00:16:24 preprocessor because I have used a full image.
-
00:16:27 I had to select preprocessor, also combining hed and canny preprocessor.
-
00:16:33 It is keeping the structure of the image perfectly well.
-
00:16:38 It is keeping much better than just using one preprocessor, one model.
-
00:16:42 Therefore, this is really important trick.
-
00:16:44 And now I will show you another very cool thing that you can do.
-
00:16:48 So this is a game that I have been developing for 13 years, Monster MMORPG.
-
00:16:53 It's a browser based game similar to the Pokemon games.
-
00:16:56 So this is one of our simple characters.
-
00:16:58 I am going to turn this character into a much better artwork style by using control net.
-
00:17:04 So how are we going to turn this character into a much better artwork?
-
00:17:09 What we are going to do is first upload the base image.
-
00:17:12 Base image is uploaded, enable, select canny edge.
-
00:17:16 I find this very well working.
-
00:17:18 Then don't forget to change the annotator resolution.
-
00:17:22 This image is 549 to 800 pixel.
-
00:17:26 So I'm going to select the annotator resolution as 1024.
-
00:17:29 When we click preview annotator, we can see.
-
00:17:33 Then all we need to do is type our prompt here.
-
00:17:37 I am using a simple prompt, a chicken game character.
-
00:17:40 I am using 1.5 pruned ckpt.
-
00:17:42 You can also use other models.
-
00:17:44 Okay, this is the first result we got.
-
00:17:46 However, I also need to change the output to same resolution of the input 549 to 800.
-
00:17:53 And this is the second result.
-
00:17:55 Now I will show you a certain seed result and amazing.
-
00:17:59 You see with just this simple prompt, no negative prompt using the canny edge.
-
00:18:05 We are able to get a much better colored image of our images.
-
00:18:11 This is perfectly fine to use in my game for example.
-
00:18:15 It can certainly improve the art style art quality of my existing artworks.
-
00:18:20 So you can apply this strategy to your professional life, working life business.
-
00:18:24 The control net is extremely strong when you use it properly.
-
00:18:29 Let me also show you the comparison.
-
00:18:31 So this simple style, simple artwork turned into this artwork with just one click of a
-
00:18:38 button.
-
00:18:39 To get high quality images as always, you need to generate hundreds of images.
-
00:18:44 This is the nature of the Stable Diffusion.
-
00:18:46 If you don't know what is control net, I have excellent three already existing tutorials.
-
00:18:50 The first one is this one, which is based on the officially released script of control
-
00:18:55 net.
-
00:18:56 The second one is based on this extension sketches into epic art.
-
00:19:00 It is working on the Automatic1111 web UI.
-
00:19:01 The third one is fantastic new control net open pose editor.
-
00:19:06 This is another awesome tutorial.
-
00:19:08 So if you enjoyed our video, please like subscribe, join us and support us.
-
00:19:13 Also, please join our discord channel.
-
00:19:16 You will find the discord channel link in the description of the video.
-
00:19:19 Also in the comment section of the video, I am showing an example from my previous video.
-
00:19:24 Just click the discord link and this page will be opened from here.
-
00:19:27 Just join our server.
-
00:19:29 Ask your questions, ask your problems.
-
00:19:32 Also, please like subscribe and please also support us on Patreon.
-
00:19:36 This is really, really important.
-
00:19:37 You will find the Patreon link on description and also in the comment section.
-
00:19:41 This is our Patreon page.
-
00:19:43 We have currently 26 patrons.
-
00:19:45 I appreciate them very much.
-
00:19:47 They are really helping me to keep going on.
-
00:19:49 Also, if you have criticism, please make your comments.
-
00:19:52 Let me know how can I make my videos better.
-
00:19:53 Thank you very much.
-
00:19:54 Hopefully to see you later.