Human Cropping Script and 4K Resolution Class Reg Images For Stable Diffusion DreamBooth LoRA
Full tutorial link > https://www.youtube.com/watch?v=QTYX0tgA5ho
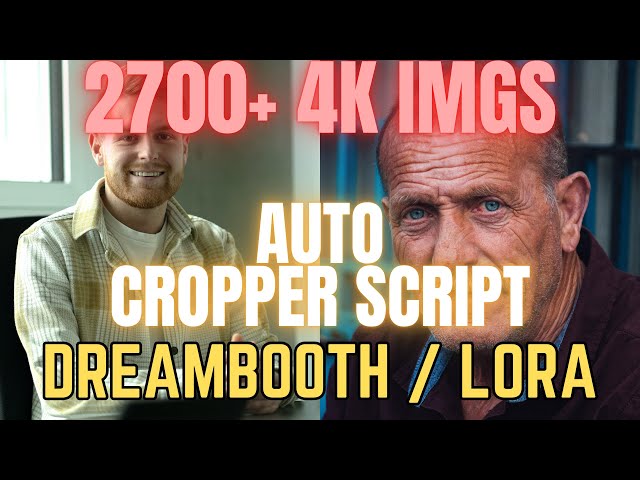


I have discovered a workflow that has never been explored before, which allows for studio-quality realism beyond expectations using Stable Diffusion DreamBooth / LoRA training. To achieve this workflow, it required an exceptionally high-quality dataset of classification / regularization images. Additionally, I developed a script capable of automatically processing thousands of real-class images at a resolution of 4K or higher. In this video, I will be sharing both the image dataset and the script with you.
Updated V7 Yolo and Retina Face Scripts
https://www.patreon.com/posts/sota-subject-and-88391247
Updated 4k + Woman + Man images datasets
https://www.patreon.com/posts/massive-4k-woman-87700469
You can download images dataset and the script from below link
https://www.patreon.com/posts/4k-2700-real-84053021
Our Discord server
https://bit.ly/SECoursesDiscord
If I have been of assistance to you and you would like to show your support for my work, please consider becoming a patron on 🥰
https://www.patreon.com/SECourses
Technology & Science: News, Tips, Tutorials, Tricks, Best Applications, Guides, Reviews
https://www.youtube.com/playlist?list=PL_pbwdIyffsnkay6X91BWb9rrfLATUMr3
Playlist of StableDiffusion Tutorials, Automatic1111 and Google Colab Guides, DreamBooth, Textual Inversion / Embedding, LoRA, AI Upscaling, Pix2Pix, Img2Img
https://www.youtube.com/playlist?list=PL_pbwdIyffsmclLl0O144nQRnezKlNdx3
Realistic Vision v2 FP32 (full precision) version - better quality - bigger size
https://huggingface.co/SG161222/Realistic_Vision_V2.0/resolve/main/Realistic_Vision_V2.0.safetensors
00:00:00 Introduction to best DreamBooth / LoRA training class images dataset
00:00:19 Introduction to auto cropper script
00:00:32 The quality and resolution of the training images dataset
00:01:24 Post processed images cropped target aspect ratios
00:01:31 Why I did prepare this dataset
00:01:41 How did I preprocess them with auto focal point crop and Automatic1111 Web UI
00:02:00 Process of auto cropping and down scaling
00:04:03 The entire auto cropping script
00:04:47 Installation of the auto cropping script
00:05:25 How to use the auto cropping script
00:07:10 Where to download images and why I needed those images
00:08:17 Use which model for realistic images training
Unlock the Secret to High-Resolution Image Classification with this Comprehensive Guide! 🚀🔥
Eager to perfect your image classification skills? Want to achieve beyond studio quality results using DreamBooth or LoRA training? Dive into the intricate world of High-Resolution Image Classification with this comprehensive tutorial.
Discover my meticulously curated image dataset, with over 2700+ stunning, high-quality images, all sourced manually from Unsplash. These are 100% royalty-free and ideal for commercial use. With resolutions reaching up to 4k and sizes up to 20 megabytes, these images will transform your AI training experience. 📸💻
BUT WAIT! There's more!
I will not only be revealing the dataset but also introducing my game-changing auto cropping script. It's designed to streamline your work process by automatically cropping subjects into your desired aspect ratios. The possibilities are endless with this script - from 512x512 to any other ratio you desire! 🖥️👨💻
What's the secret to achieving stellar results? The magic lies in the details. Watch as I delve into the nuances of this script, showcase its effectiveness and efficiency on various images, and take you through the entire process, step-by-step.
Don't want to miss the secret sauce? Get your hands on the script files and take a peek into the inner workings! For all my Patreon supporters, this will be shared on my Patreon page. To get in on this exclusive access, click the link in the description to become a supporter. 🏆💰
And that's not all!
Be the first to preview my upcoming workflow to push DreamBooth training beyond studio quality! 🌟🚀
To top it all off, I recommend using the Realistic Vision Version 2 SafeTensors file for training. It boasts an impressive 3.85 gigabytes of weights, making it a formidable tool for your training. Direct download link available in the video description and Patreon post.
Join my Patreon today for exclusive access to the dataset, script files, and other exciting perks. Your support helps me create more quality content and tools like these.
Join our community on Discord. Link available in the description.
Give your AI training a major boost with these resources. Don't forget to like, subscribe, and share to stay updated on future content.
#AI #MachineLearning #ImageClassification #DeepLearning #DataScience #BigData #ArtificialIntelligence #ComputerVision #DreamBooth #LoRATraining #Unsplash #AutoCropping #HighResolution #Patreon #Python #Scripting #RealisticVision #SafeTensors #DataPreprocessing #OpenAI #Dataset #TrainingModels #DataAnalytics #ImageProcessing #Automatic1111
-
00:00:00 Greetings everyone.
-
00:00:01 I have prepared a super high quality classification
-
00:00:05 regularization
-
00:00:07 images dataset for man class.
-
00:00:09 This dataset can also be used for fine tuning of Stable Diffusion
-
00:00:14 models.
-
00:00:15 You can use these images when doing DreamBooth or LoRA training.
-
00:00:19 Moreover, I have prepared an amazing auto cropping script.
-
00:00:24 This script will crop your subjects into the desired
-
00:00:29 target aspect ratios fully automatically.
-
00:00:31 So majority of the raw images that I have prepared
-
00:00:36 and shared have over 4k resolution.
-
00:00:39 For example, this image is 20 megabytes and over 11,000 pixels
-
00:00:46 height and 9,000 pixels width.
-
00:00:49 So this is the image.
-
00:00:50 Let me show you the default resolution.
-
00:00:53 You see, these are the details of the original image.
-
00:00:58 As you are seeing, it is super high quality.
-
00:01:01 Majority of the images are like this and I have over 2700 images that I share with you.
-
00:01:08 These images are collected by me manually from unsplash.com.
-
00:01:13 Therefore, they are 100% okay to use for even commercial purposes.
-
00:01:20 So by using the script that I have developed, I have cropped these images into these aspect
-
00:01:28 ratios. Why did I prepare this dataset?
-
00:01:31 Because with my upcoming workflow to do DreamBooth
-
00:01:34 training beyond studio quality, I needed real images with
-
00:01:38 higher resolution, higher dimension.
-
00:01:40 After cropping these images into these dimensions, then I used Automatic1111 web UI train tab
-
00:01:48 preprocess images to downscale them into the target dimension.
-
00:01:53 And when doing this, I have used auto focal point crop.
-
00:01:57 Why?
-
00:01:58 Now I will explain you the process.
-
00:02:00 So let's say I have this image that I will turn into the different aspect ratios.
-
00:02:07 This image resolution is 2916x4886.
-
00:02:14 Therefore, this image won't fit into all of the aspect ratios.
-
00:02:20 For example, my script has found that this image can only be extracted as 2915x4551
-
00:02:30 for 512x512 aspect ratio because my script is extracting the subject, the person.
-
00:02:38 Therefore, it cannot crop it automatically.
-
00:02:41 So with using Automatic1111 web UI cropping script,
-
00:02:46 this is the final result we got for 512 and 512.
-
00:02:50 You see the face part is automatically cropped that will fit into 512 and 512.
-
00:02:57 Okay, this is another example image.
-
00:03:00 This is raw image 4,000 by 6,000.
-
00:03:03 As you see, this can be cropped perfectly fine into pretty much any dimension.
-
00:03:09 So you see this is the 512 by 512 aspect ratio that my script has automatically extracted.
-
00:03:16 Then by using the Automatic1111 web UI, we downscaled it to 512 by 512.
-
00:03:23 Let's also look at another aspect ratio.
-
00:03:26 So this is the image in 768 by 1024 pixels.
-
00:03:32 All of these are automatically done with my script and post-processing of Automatic1111
-
00:03:37 web UI.
-
00:03:38 From this raw image into this absolutely perfectly cropped image in this aspect ratio.
-
00:03:46 So now let me show you how my script works.
-
00:03:48 So this is the entire script.
-
00:03:50 It is pretty easy to use.
-
00:03:52 You can write here any aspect ratio that you want.
-
00:03:55 It will automatically process all of the images in the given folder
-
00:03:59 and turn them into these aspect ratios.
-
00:04:03 So this is the script.
-
00:04:04 Let me show you a script with zooming in if you want to type it.
-
00:04:08 Alternatively, I have posted this on my Patreon.
-
00:04:12 This is another part of the script.
-
00:04:13 Just pause the video and type it if you are not my Patreon supporter.
-
00:04:18 This is another part of the script.
-
00:04:20 I have spent quite a bit of time to write this script.
-
00:04:24 This is written from scratch by me.
-
00:04:27 So here is another part of the script and here is the end of the script.
-
00:04:30 For using this script, you just need to change the folder paths here.
-
00:04:36 The first folder is your raw images and the second folder is the target folder
-
00:04:42 where the images will be extracted.
-
00:04:44 Let me quickly show you the installation.
-
00:04:46 So after downloading the script files from this Patreon post,
-
00:04:50 put them into any folder you want or you can write it yourself.
-
00:04:54 In the requirements.txt file, these are the requirements.
-
00:04:58 Start a new cmd window.
-
00:05:00 Type python-m venv venv.
-
00:05:04 Then move into your venv folder like this.
-
00:05:08 Move into scripts.
-
00:05:09 Activate.
-
00:05:10 Then move into the root folder where you have downloaded the files.
-
00:05:14 Type pip install -r requirements.txt.
-
00:05:18 It will install all of the dependencies, necessary libraries.
-
00:05:22 So here installation completed folder.
-
00:05:25 Put the original images into original images folder.
-
00:05:29 Don't forget to change the path of your original images folder like this.
-
00:05:34 Open your virtual environment scripts.
-
00:05:37 Activate.
-
00:05:38 Move into the root folder.
-
00:05:40 Type python.
-
00:05:41 Then the script name, which is cropper.py.
-
00:05:45 Hit enter.
-
00:05:45 And it will start processing all of the images.
-
00:05:49 Don't forget that you have activated the virtual environment.
-
00:05:52 Now we will begin to see results in these new images folder.
-
00:05:56 This script is extremely useful to auto crop massive amount of images.
-
00:06:02 Okay, it's starting processing.
-
00:06:04 You see it is also pretty fast.
-
00:06:06 Let's look at the folders.
-
00:06:08 You see it is extracting my own images with the desired aspect ratio.
-
00:06:14 This is 512, 512.
-
00:06:16 This is 512, 768.
-
00:06:19 This is 640, 960.
-
00:06:23 This is 768, 512.
-
00:06:26 This is 768, 1024.
-
00:06:31 This is 960 by 640.
-
00:06:34 So you can set any aspect ratio that you want in this array here and it will extract
-
00:06:42 in that ratio like 200 and 350.
-
00:06:47 You can type anything here.
-
00:06:48 These are not resolutions.
-
00:06:50 These are aspect ratios.
-
00:06:51 It will extract with the maximum possible resolution.
-
00:06:55 Then use Automatic1111 web UI
-
00:06:58 train tab, preprocess and downscale them into any width and height you want with
-
00:07:04 autofocal point crop.
-
00:07:05 Select the focal point weight of face from here if you wish.
-
00:07:10 So this is the link where you will be able to download all of these images and the script
-
00:07:15 files.
-
00:07:15 If you become my Patreon, I would appreciate that very much.
-
00:07:18 The link will be in the description of the video.
-
00:07:21 You will find the links for these zip files in this Patreon post.
-
00:07:26 512 by 512, 875 megabytes. 512 by 768, 1.22 gigabytes.
-
00:07:37 Also, I have posted the raw images.
-
00:07:39 The size of the raw images is 7 gigabytes.
-
00:07:42 You will be able to download all these post-processed
-
00:07:46 images and you will be able
-
00:07:48 to directly use them as a classification images or for fine tuning.
-
00:07:51 You can use them in DreamBooth training, in LoRA training.
-
00:07:54 Why this matters?
-
00:07:55 Because I have found a new amazing workflow that will produce even better than studio
-
00:08:02 quality photo shoots on your computer with DreamBooth training.
-
00:08:06 For this task, I have used 768 by 1024.
-
00:08:11 Therefore, I have collected and prepared this amazing images data set for you.
-
00:08:16 One more thing, I also suggest you to use this realistic vision version 2
-
00:08:23 SafeTensors file for training, which is different than hosted on the CivitAI.
-
00:08:28 Why?
-
00:08:29 Because this file is 3.85 gigabytes.
-
00:08:32 It has more weights.
-
00:08:33 It is better for training.
-
00:08:35 The direct download link for this file is posted on Patreon post,
-
00:08:40 and also it will be available in the description of the video.
-
00:08:43 If you have enjoyed this video, please subscribe, join, support me on Patreon.
-
00:08:47 I appreciate that very much.
-
00:08:48 I have spent like over two days full time to prepare this data set and this script for
-
00:08:55 you guys. Also, don't forget to join our Discord channel.
-
00:08:58 You will find our Discord channel link in the description of the video.
-
00:09:01 Also, the Patreon link will be in the description of the video.
-
00:09:04 You will also find these links in the pinned comment of this video as well.
-
00:09:09 Thank you so much, guys.
-
00:09:10 Hopefully, I will make a new video about this new workflow
-
00:09:15 that I have developed for super high quality DreamBooth training.
-
00:09:20 See you later.