2a. Launch data science environment: Azure
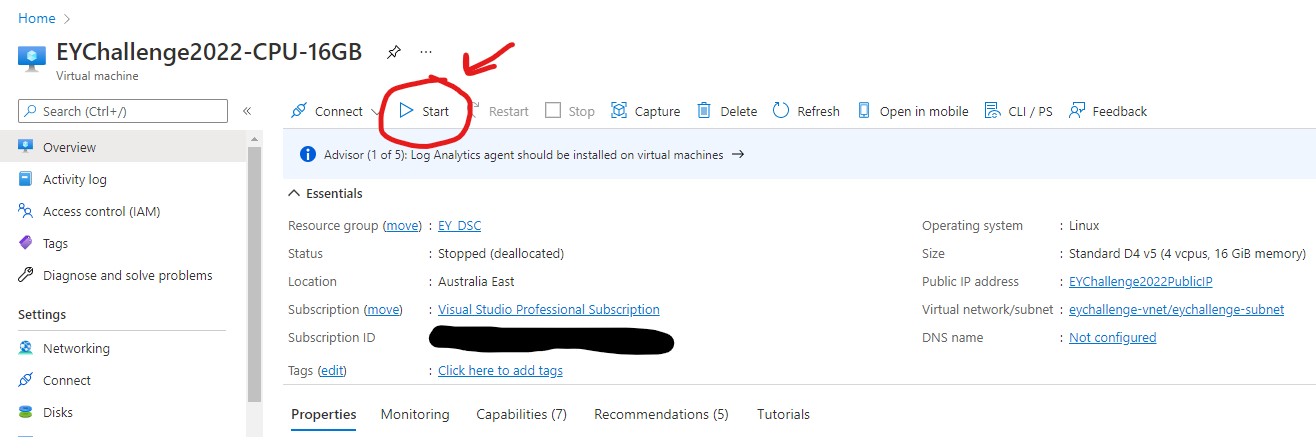
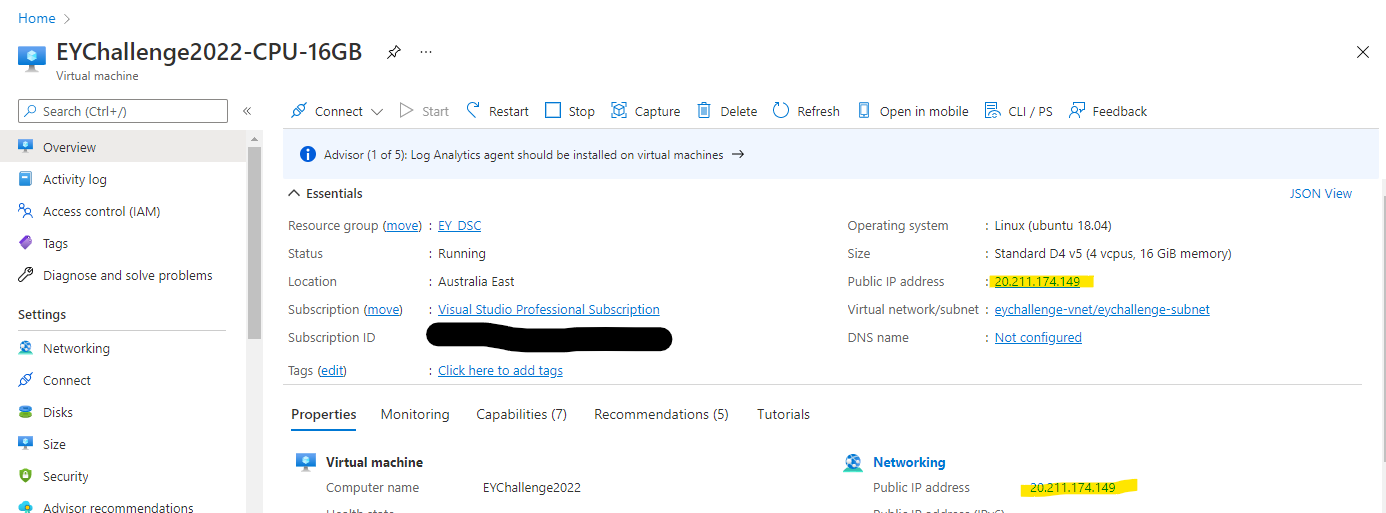
3. Once the VM has finished booting up (this takes a few minutes), find the Public IP address of the VM. Note this changes each time you restart the VM.
There are many ways to connect to your VM, three of which are described in this tutorial. We recommend accessing the VM through your browser via JupyterHub, as this is often the easiest approach. To see how to access the VM via SSH or via X2Go, then see the tutorial linked above.
-
From your local machine, open a web browser and navigate to https://your-vm-ip:8000, replacing "your-vm-ip" with the IP address you took note of earlier.
-
Your browser will probably prevent you from opening the page directly, telling you that there's a certificate error. The DSVM is providing security via a self-signed certificate. Most browsers will allow you to click through after this warning. The way to bypass this on Chrome is to type "thisisunsafe". Other browsers may have a different override mechanism. Many browsers will continue to provide some kind of visual warning about the certificate throughout your Web session.
Note: If you see the ERR_EMPTY_RESPONSE error message in your browser, make sure you access the machine by explicitly using the HTTPS protocol, and not by using HTTP or just the web address. If you type the web address without https:// in the address line, most browsers will default to http, and you will see this error.
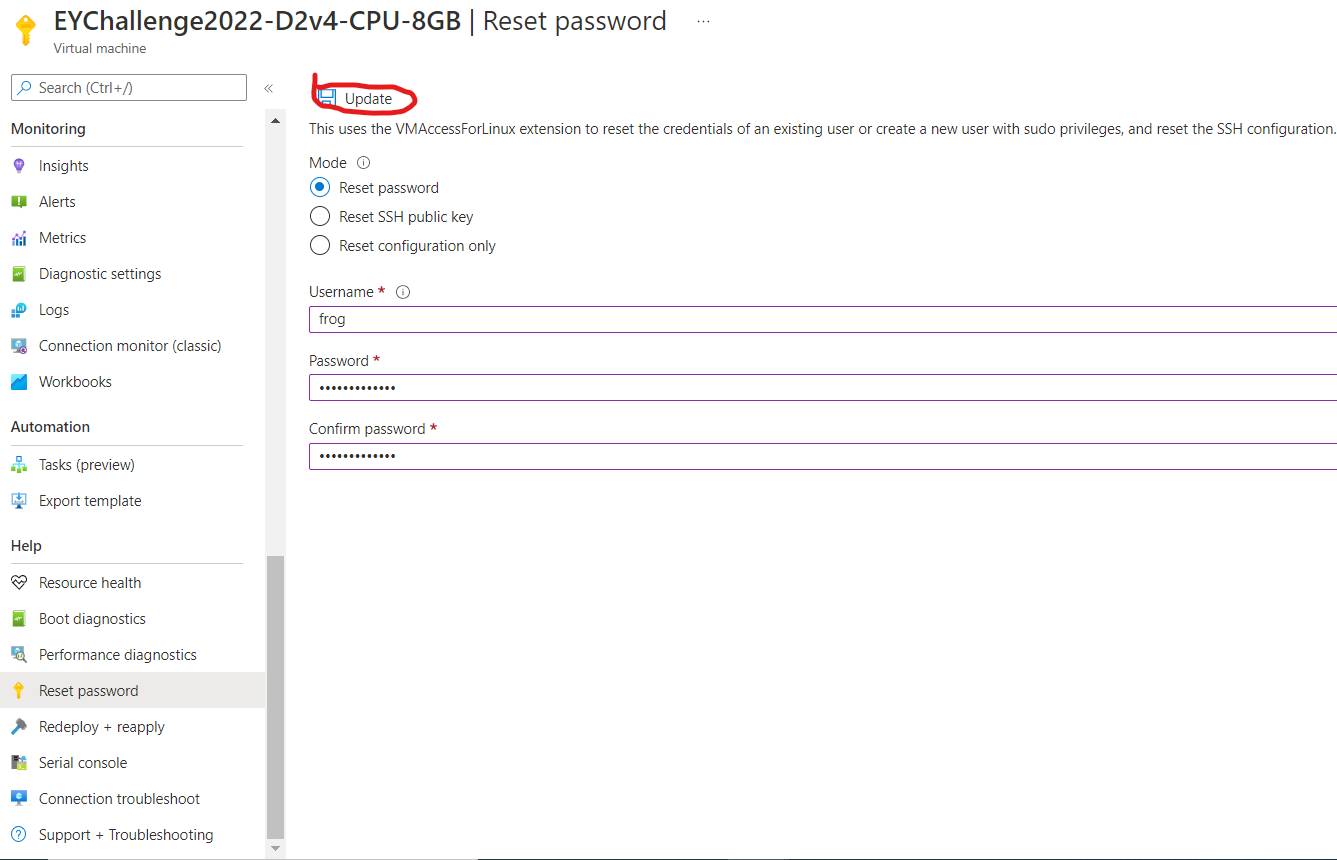
- Once in, you should be prompted with JupyterHub's login screen. Login with username 'frog' and the password you made when setting up the VM. If you have forgotten your password, or the password appears not to work, you can reset the password from the Azure portal via the 'Reset Password' option on the left menu. See here OR below for a more detailed guide on resetting the VM password.
Note: The username is always "frog"
It should redirect you to JupyterLab, the next generation of Jupyter notebooks and JupyterHub, with the base url https://your-vm-ip:8000/user/frog/lab. Here you should have access to the challenge resources in the 'notebooks' folder.
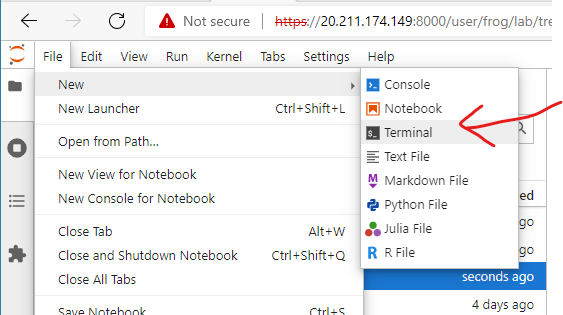
- The VMs linux terminal can be accessed through JupyterHub by navigating to
File->New->Terminalfrom the dropdown menu on the top left of the page (detailed in the next section). This terminal may be useful for installing conda virtual environments and packages, troubleshooting, managing git, and exploring and organising the filesystem.
Once you have access to JupyterHub, we must prepare the conda environment with the packages required to run the benchmark notebooks.
- Once on JupyterHub, open a new terminal as shown below
- Once the terminal boots up, enter the following command to navigate to the 'notebooks' folder - this is the root folder that JupyterHub has access to, and therefore anything within this folder can be accessed through JupyterHub via the navigation panel on the left.
cd notebooks- Clone the repository into the notebooks folder by entering the following command:
git clone https://github.com/EY-Data-Science-Program/2022-Better-Working-World-Data-Challenge.gitOnce this is completed, you should see the '2022-Better-Working-World-Data-Challenge' folder in the navigation panel on the left of JupyterHub. You may double click this to enter the folder on JupyterHub. However, to navigate to this file in the terminal, enter the following command:
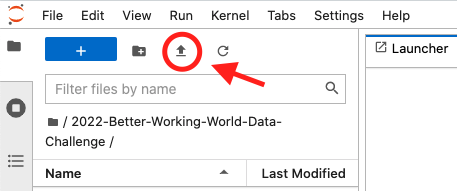
cd 2022-Better-Working-World-Data-ChallengeAlternatively to the instructions so far under Step 1, you can download a zipped file (from here), and then extract all the contents and upload the relevant files and folders directly to JupyterHub via the upload button on the top left, pictured below. This will give you the code repository, but without any of the version management features that Git provides.
Now that we have downloaded the challenge files, we need to create a virtual environment that will be used to run our code. This virtual environment needs to have the appropriate packages installed with the right versions for the benchmark challenge notebooks to be able to run. This step will create this virtual environment and install the required packages in a few easy steps.
- Some of the packages required for the challenge will need to be installed from conda-forge. It can help to add conda-forge to the conda default channels through the following command:
conda config --append channels conda-forge- To create a new virtual environment (which we will call "2022DSC") with the correct versions of the dependencies, use the 'requirements.txt' file in the repo through the following command:
conda env create -n 2022DSC --file ./notebooks/requirements.txtwhere './notebooks/requirements.txt' is the path to the environment.yml file. We assume the terminal is already at the '2022-Better-Working-World-Data-Challenge' folder, which was done at the end of Step 1.
Alternatively, you can install the packages manually using the command below, however conda might take a while to solve for the dependencies between these packages. This method is not recommended.
conda install contextily xarray zarr aiohttp requests pystac pystac-client planetary-computer nb_conda_kernels scikit-learn fsspec shapely GDAL=3.2 rioxarray stackstac xarray-spatial- Close the terminal window
Note: If you encounter any issues with dependencies, please refer to this discussion post. Reply with any issues that the post does not address and we will do our best to attend to them.
To run the challenge benchmark notebook, navigate to it on JupyterHub and open it.
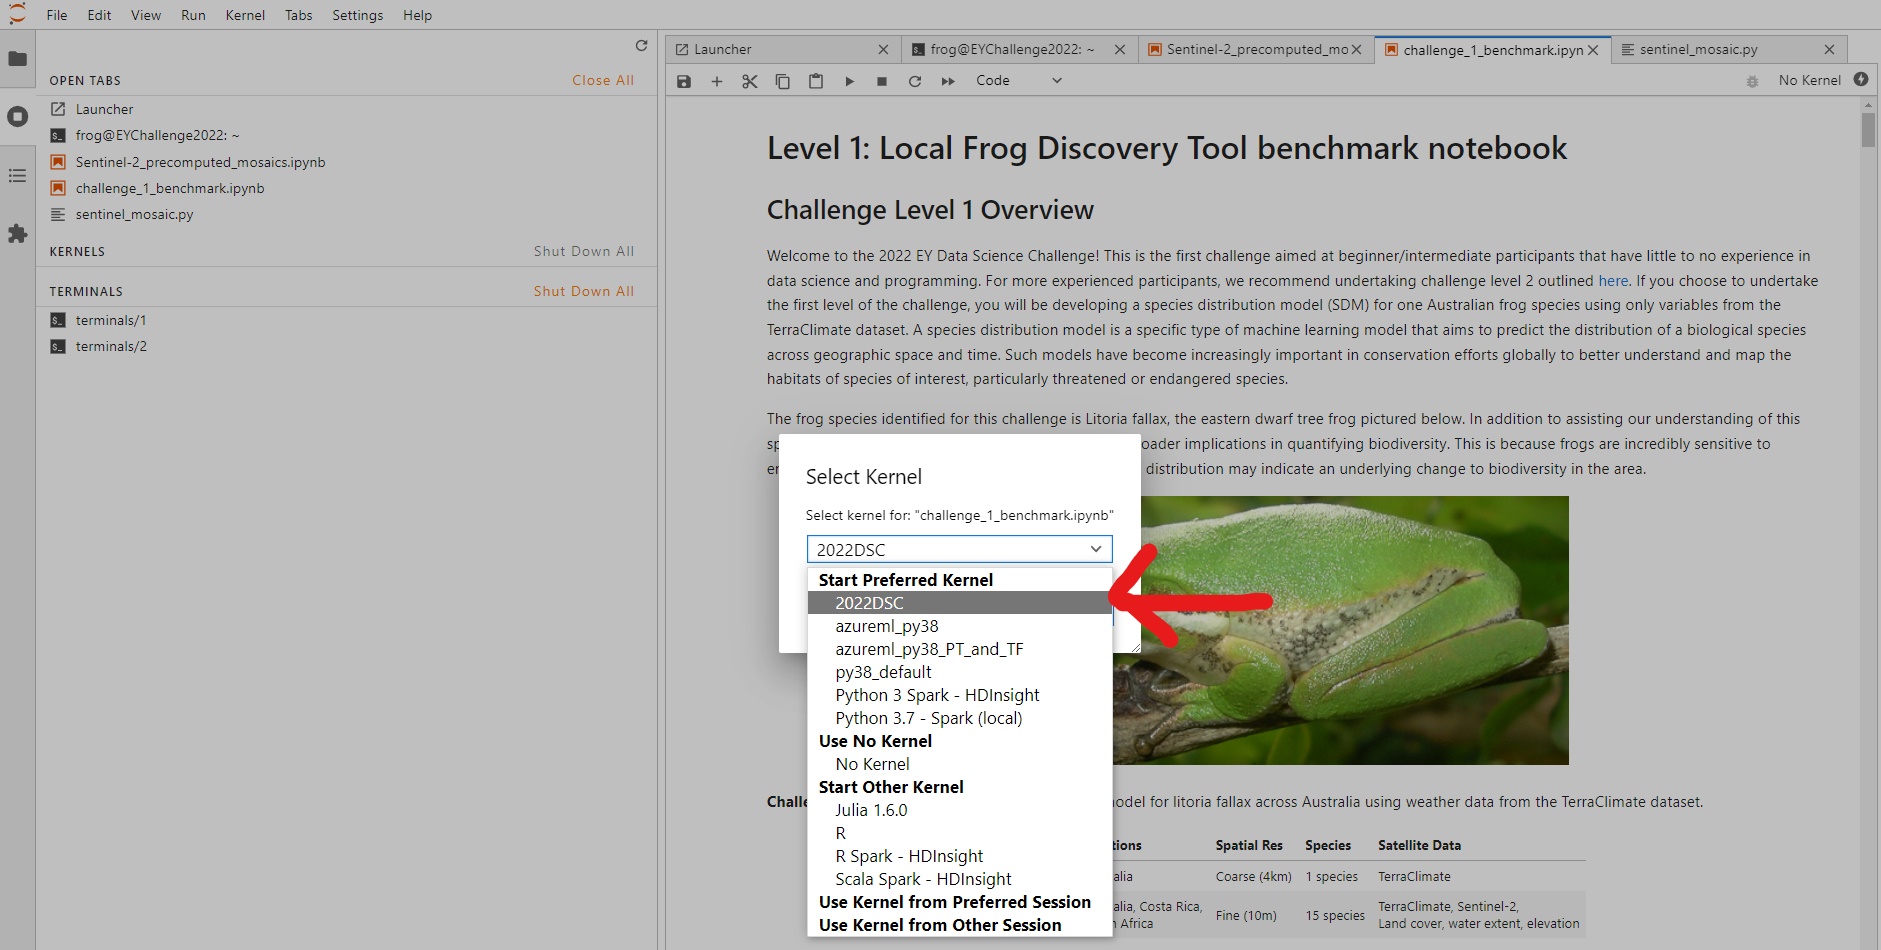
On the top right of the screen, there is an option to change the kernel, depicted below.

Click on this and a dropdown menu should appear. Select '2022DSC' from the menu.
Click 'Ok',
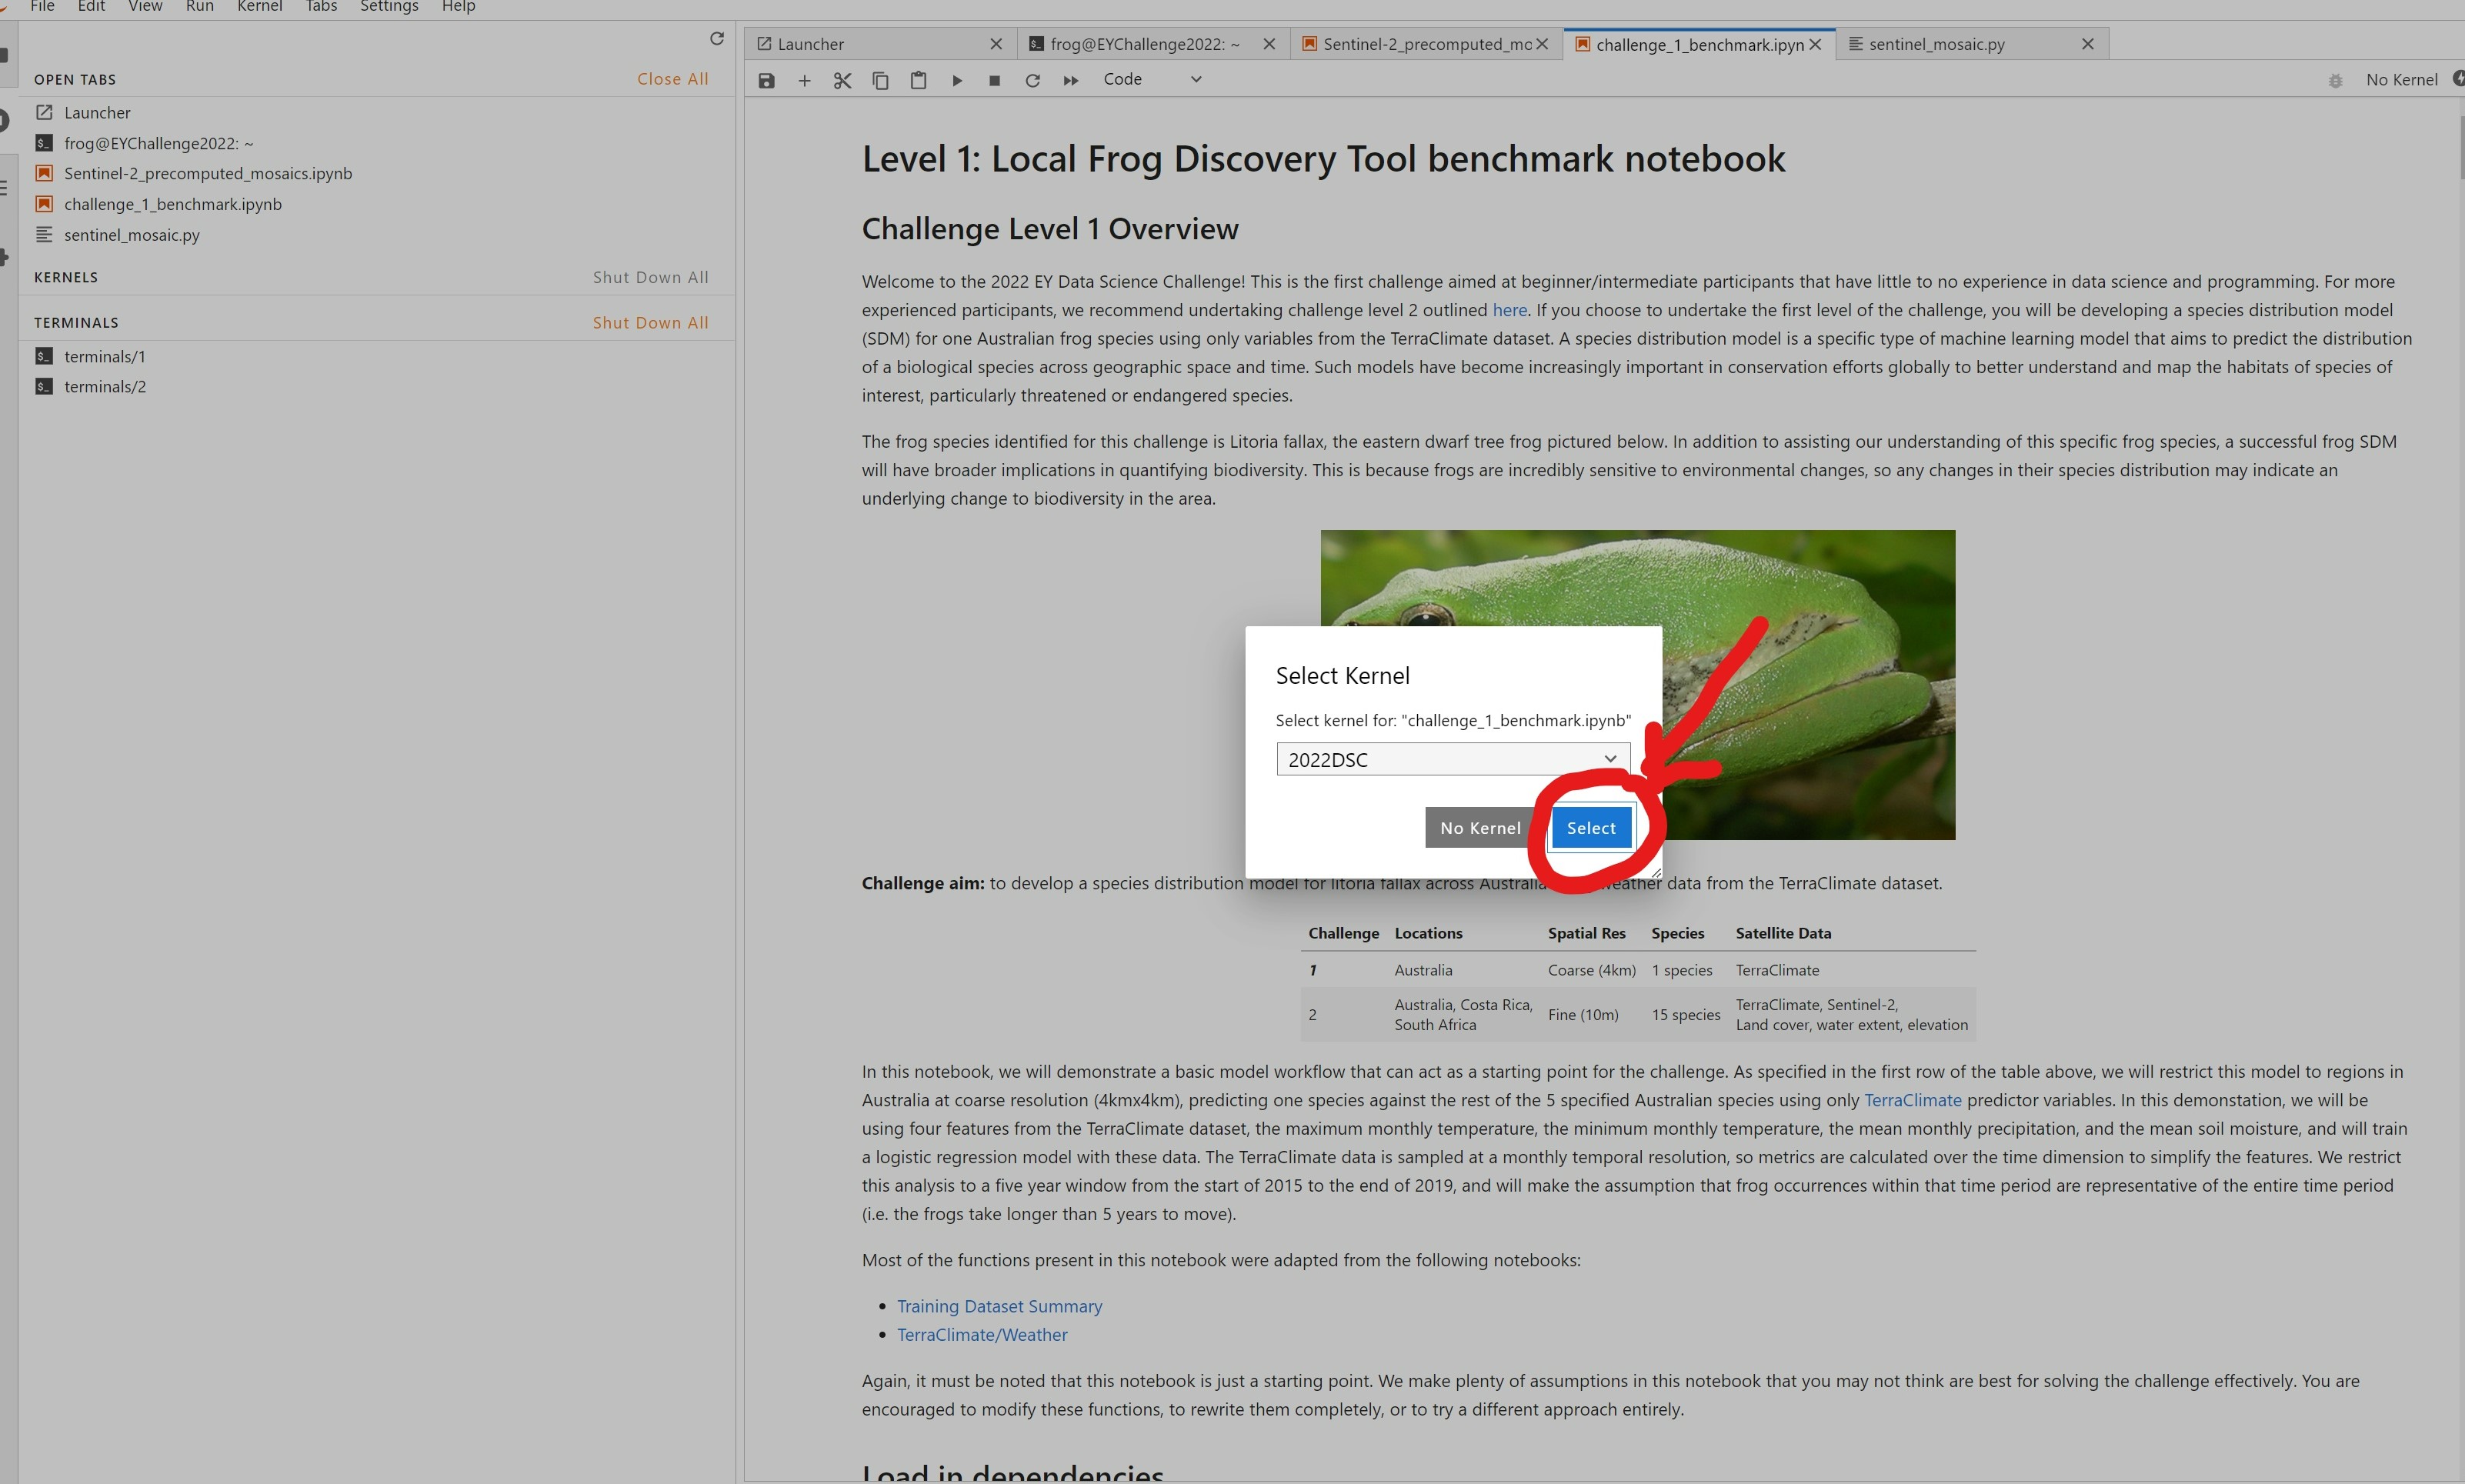
Note: The name of the virtual environment may not appear straight away, so be patient if it doesn't show immediately.
Once your virtual environment is connected as the kernel of the notebook, you can go ahead and run the notebook to create the benchmark submission file!
We strongly recommend setting up code management with Git before you begin writing code:
- Code management and collaboration: Tips on how to manage your code and work with others
Other VM related managerial tips are outlined below:
-
How to stop your data science environment: How to stop your environment and save credits.
-
Schedule VM Auto-shutdown: Implement auto-shutdown to avoid consuming azure credits unnecessarily
-
Cost Management: Azure: Learn how to get the best out of your credits
-
How to delete your data science environment: How to remove your environment. You can always re-deploy it to get the latest release.
-
EY Challenge Website: Main challenge website, read about the challenge and submit your results here!
