-
Notifications
You must be signed in to change notification settings - Fork 13
Ubuntu Server RPI4B
reubenajohnston edited this page Apr 4, 2025
·
7 revisions
- Download and copy this latest ubuntu rpi image to the VM and cd into the directory with it
- Confirm the file is in your current directory
$ ls ubuntu-24.04.2-preinstalled-desktop-arm64+raspi.img.xz - (Optional step, as you can dd the compressed image later) Extract the image
$ unxz ubuntu-24.04.2-preinstalled-desktop-arm64+raspi.img.xz - Verify it extracted
$ ls ubuntu-24.04.2-preinstalled-desktop-arm64+raspi.img - Plug in your sd-card into the USB reader and attach it to the VM
- Identify the block device for your sd-card (SIZE should be close to your SD card size, my sd-card is 64GB and was /dev/sdc)
$ lsblk -p NAME MAJ:MIN RM SIZE RO TYPE MOUNTPOINT /dev/sda 8:0 0 50G 0 disk ├─/dev/sda1 8:1 0 42G 0 part / ├─/dev/sda2 8:2 0 1K 0 part └─/dev/sda5 8:5 0 8G 0 part [SWAP] /dev/sdc 8:32 1 59.5G 0 disk ├─/dev/sdc1 8:33 1 122.1M 0 part └─/dev/sdc2 8:34 1 58.6G 0 part /dev/sdd 8:48 1 57.8G 0 disk └─/dev/sdd1 8:49 1 57.8G 0 part /media/kali/TRAVELER1 /dev/sr0 11:0 1 1024M 0 rom - Don't worry if there are existing logical partitions on your device, you will clear them in the next command
- Write the image to the sd-card using dd (have the block size be at least half of the max speed!)
$ sudo dd if=ubuntu-24.04.2-preinstalled-desktop-arm64+raspi.img of=/dev/sdc status=progress bs=16M && sync- If the image is compressed via xz, then use something like:
$ xzcat ~/Downloads/ubuntu-24.04.2-preinstalled-desktop-arm64+raspi.img.xz | sudo dd of=/dev/sdd status=progress bs=32M && sync
- If the image is compressed via xz, then use something like:
- Mount the first logical partition to edit cmdline.txt and config.txt
$ sudo mount /dev/sdc1 /mnt - Edit /mnt/cmdline.txt and make sure the following are present
console=ttyS0,115200 console=tty1 fsck.repair=yeszswap.enabled=1 zswap.zpool=z3fold zswap.compressor=zstd multipath=off dwc_otg.lpm_enable=0 console=tty1 root=LABEL=writable rootfstype=ext4 rootwait fixrtc quiet splash - Edit /mnt/config.txt and make sure the following line is present
enable_uart=1 - Unmount the first logical partition
$ sudo umount /mnt - Eject the sd-card before you remove it
$ sudo eject /dev/sdc - Attach the FTDI-USB-Serial cable to your RPI4's UART0 and attach the USB to your PC (see https://github.com/jhu-information-security-institute/NwSec/wiki/RPI4B for wiring); attach the device to your VM and it should be /dev/ttyUSB0
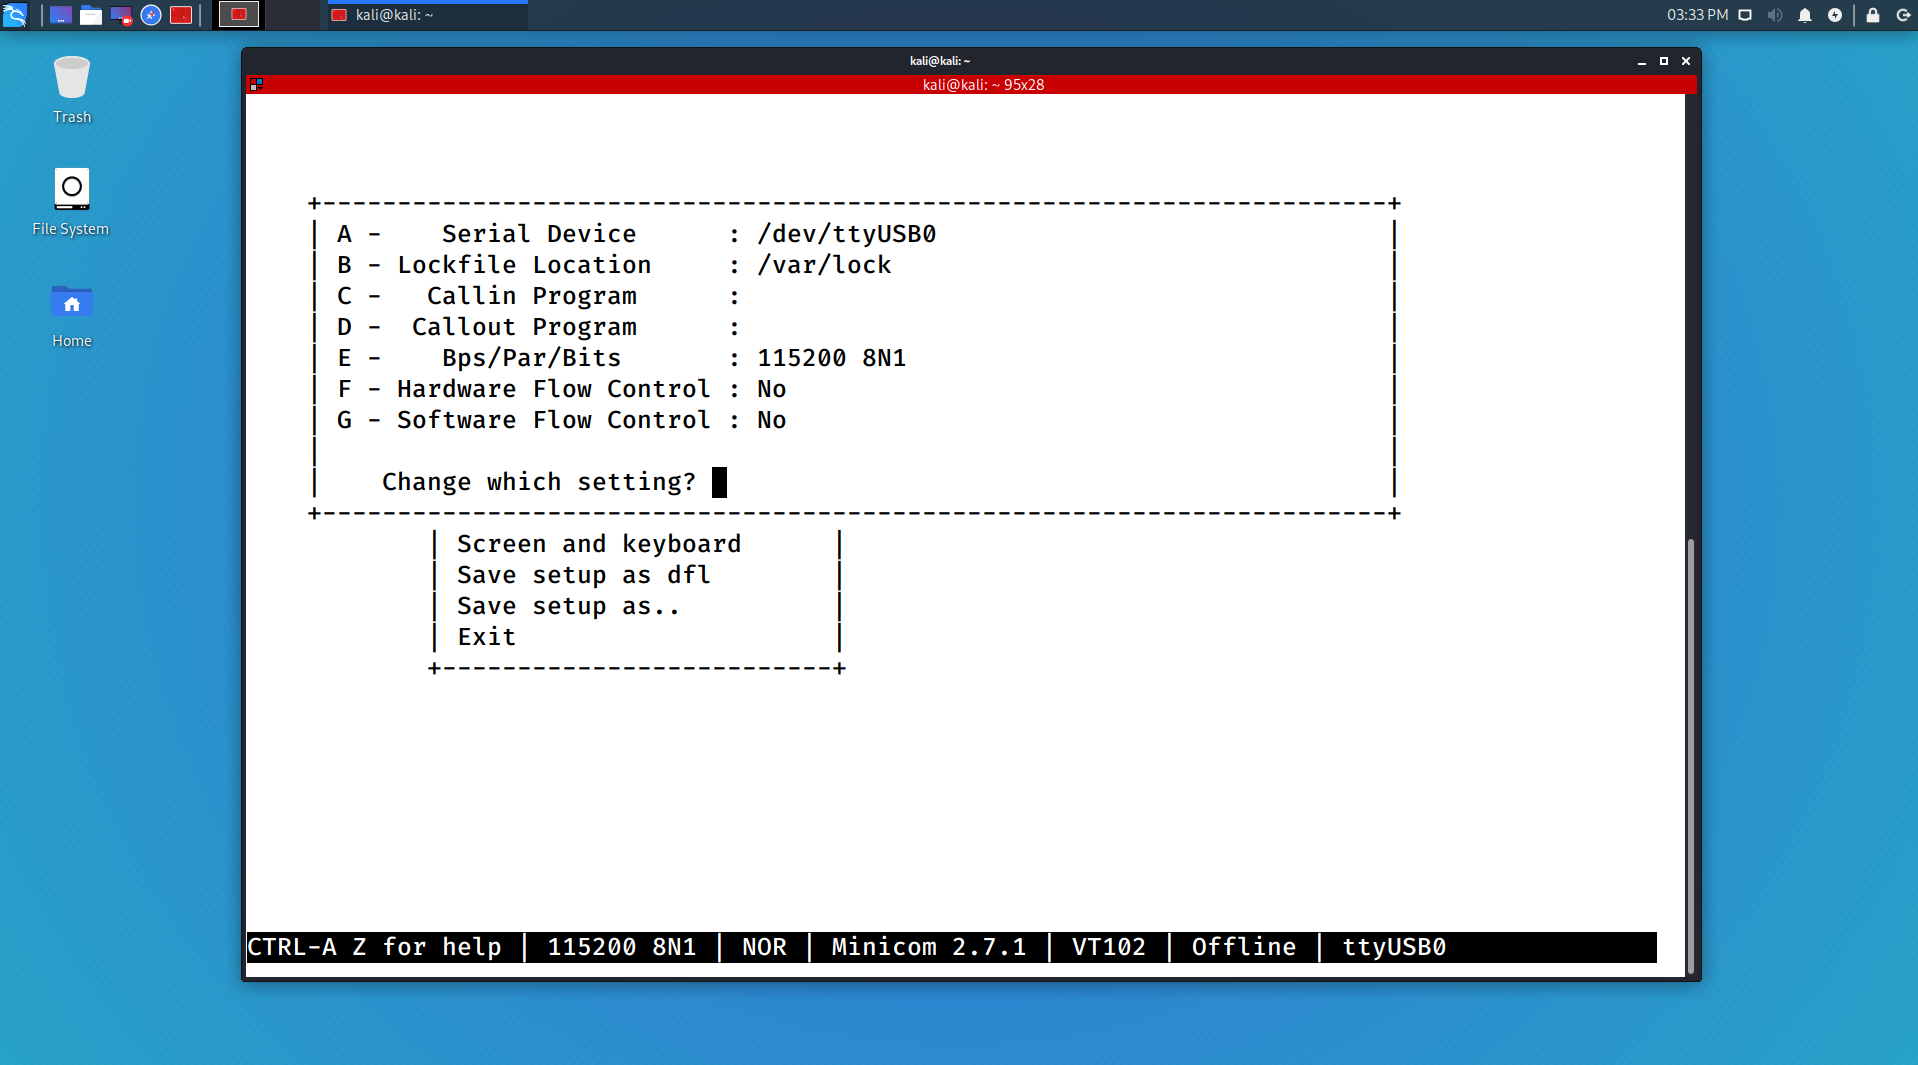
- Open minicom on /dev/ttyUSB0; Settings should be 115200,8N1,No,No
$ sudo minicom -D /dev/ttyUSB0
- Insert the sd-card into the RPI4
- Power on the RPI4
- First boot could be slower if the sd card is large and needs to be resized
- Wait for the RPI4 to boot and login with
ubuntu,ubuntu, source - Setup networking (see the section below)
- Edit /etc/apt/sources.list and change from kali-rolling to kali-last-snapshot
- Run an update sequence
$ sudo apt-get update - Get the ip address of your rpi
$ ifconfig - openssh-server should be already installed, and you can SSH into the RPI4 by using its ip address, e.g.,
$ ssh root@ipaddressofpihere - login using a KVM and disable Screensaver and Lock Screen from the Screensaver Preferences
- Disable Display power management in Power Manager
- install terminator
$ sudo apt-get install -y terminator
- Default credentials to login are:
ubuntu, ubuntu